Below is a three view sketch of a basic chair top design. It shows two posts as they emerge from the seat. To start, I thought that it would be best to have the posts be straight, to determine their basic limits.
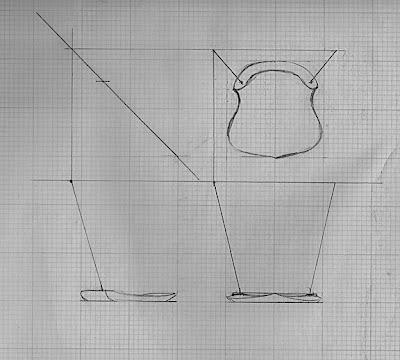
As I covered in previous posts, information is taken from one drawing to the next to create the three views. When I design a chair, I work from some basic limits. For instance, I generally know where in space that I want the crest to sit, and you can imagine that the points on the end of the posts in each drawing would be in contact with the crest at that point.
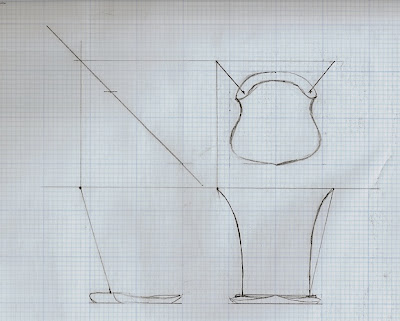
Well, that being the case, it may not matter if the posts are straight or curved, as long as the top points are at the correct spot to support the crest at the chosen position. So for fun, let's throw in some curves. Initially, I like to focus on the front view, although it might change later based on the results in the other views. This curve is a bit extreme for an actual chair, but I thought that it would help to illustrate the point.
One very important factor to note about the chair that I am drawing, is that the curve that I am going to draft still sits in the sight line plane. In other words, just like the straight post, when viewed from above, the post will look like a straight line, so the overhead view won't change as I plot the points.
Below, you can see that I've plotted a point to start the side view.
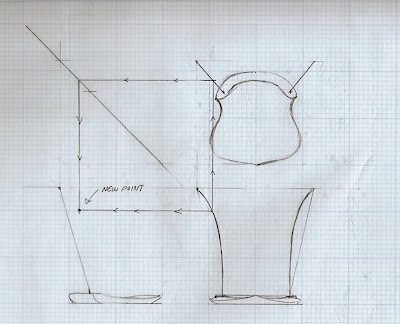
I do this by selecting a point on the front view of the post and drawing a line horizontally to the side view. Then I project a line vertically from that same point and then "refract" it back down to the side view. Where they meet is my new point. It's fun to watch the curve emerge as I plot more points.
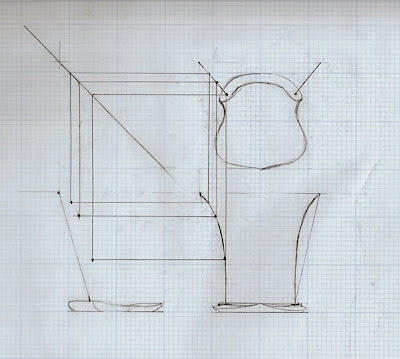
And here's the finished curve, truly a bit extreme!
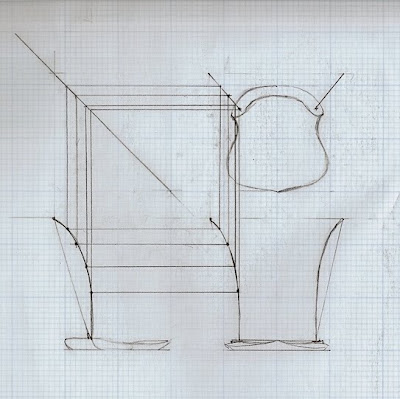
Now with the side view apparent, it would be a good time, if making an actual chair design, to adjust the side view and then plot the points back to the front to see how to possibly temper this intense curve. In this instance, the side view is extreme because of the limit that I set in the beginning that the overhead view remain straight. Getting into curves that lie in a tilted sight plane is a bit heady for this example, and frankly, it makes my head spin.
Now, this is all fine and dandy, but if I was actually making a form to bend this curve, the information to shape it isn't apparent in this drawing, after all, the actual curve isn't seen fully in the front or side view. What we need is a profile of the curve, or in other words, the view from the side of the sight line.
I figured out this method years ago and then promptly forgot how I'd done it! With my recent renewed interest in drafting my curvaceous chair, I rediscovered the method.
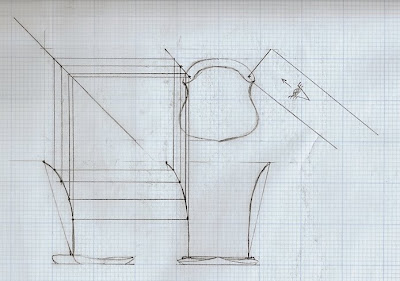 Basically, we want the view that the creepy eyeball in the image has. So by extending lines at 90 degrees to the post in the overhead view and refracting them at 1/2 the angle of the sight line of the post, we can begin the same process that we followed before to get the side view of the curve.
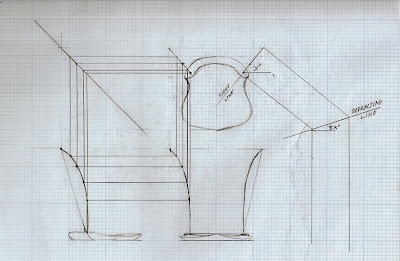
Below is the resulting curve. Hopefully you can imagine that if you rotated the curve that I plotted on the right, it would be the same as what you see in the other images.
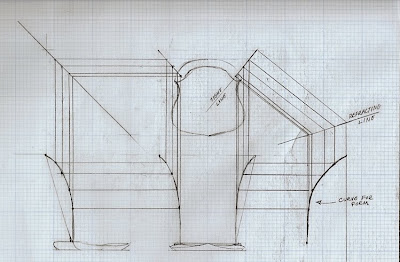
Sitting down, working this out and thinking this way has help me understand more of the geometry involved in the chairs that I am making and the factors that I can control to make them more beautiful and comfortable. While it may seem like too much of a throwback to a time passed, to me, it's just like the time spent making chairs by hand, time well spent.

3 comments:
Hi Peter,
In your classes do you go through this process? I can kind of follow along with the posts, but actually drawing them out step by step in real time would be fantastic.
Pete - your sharing of information is much appreciated.
Robert -Stow Ohio
When students come to my shop for classes, I'm happy to share whatever info that I can, including chair patterns etc... it's a tradition that passes from Dave Sawyer through me. My best advice for learning to draw like I've been showing is to pick a very simple design of an existing chair and try to render it. Good luck,
Pete
Post a Comment