Showing posts with label Chair Design. Show all posts

Tuesday, July 12, 2016

A Fine Time


I just returned from the Lie-Nielsen open house in Maine and, as usual, I can't say enough about the host and all the other makers. It's the one show that I go to every year and it's a great chance to see my friends and get feedback on new work. I highly recommend going.
 Here is a rocker that I finished in preparation for the show. I fumed it in ammonia as you see in the tent below.
Here is the before and after. I went darker than usual, just to see what the results would be like, I think it suits the design nicely.
Here is one of my favorite details. I've been wanting to make a crest like this for some time, and I think it will be appearing in my chairs more often.

Here you can see the oil going on over the fumed wood, I don't think the video will play, but the image say it all.  I fumed it overnight to get this color with regular household ammonia.

Tuesday, April 26, 2016

Empty Nest...soon

I've been finishing up these three little youth chairs lately. They have a presence that's hard to ignore, something about the fine details and scale makes them stand out. Soon they'll all be gone, and as much as I look forward to the extra space in the shop and less risk of damaging finished pieces while working, I"ll miss em.
I've been posting pics to instagram for a while, frankly it's much more of a hit and run easy way to post, but I just got a new laptop, so here I am in the shop, sitting in my new rocker typing away, hopefully the ease will help get me back in the blog game. Here are the ears before and after burnishing and oiling.
 Besides lots of chairs, I've been working on making a shop dog of Kobe. He's no scruffy shop dog, but as long as I keep a space heater on him and give him a bed, he's good company.
I'll be teaching in a couple of weeks at North Bennet Street, so you can see the mess I'm making doing the turnings.
We've added a class in August, which is my last one this year. I"ll spend the fall at Suny Purchase on an artist residency. This summer I'll be teaching for the first time at Lie Nielsen and shooting a video to boot. If you are going to their open house, I'll see you there!


Wednesday, September 3, 2014

Big Tease

I know that things are quiet here, but it's not because nothing is happening, it's that too much is happening. Chris Schwarz and I have set the release time for the book in early December and I am thrilled to get it out there. But right now, I am focusing on my talks at Woodworking in America down in Winston Salem at the end of next week.
Perhaps it's the fear of standing in front of a crowd with nothing to say, or maybe just that I haven't had a moment to finish a thought in the last year, but as I've turned my attention to the talks that I'm slated to give, I've had some wonderful breakthroughs in my process for creating rockers this week.

By the way, the process for giving talks works like this, "sure Megan, I'd love to, how about talking about rocking chairs for two hours?!". Then comes the "what do I really know about rockers?" part.

Yes, I've been making them for 14 years, but with all the variables and processes, they have always been challenging to design and execute.
 
 At my talk on rockers, I will be demonstrating not only the concepts involved, which are pure nerdy joy, but also the nuts and bolts for creating a rocker that needs little more than the shifting of your eyelids to take you on a lovely ride. There is nothing like plunking down in a rocker that is tuned to your body and sitting habits and I will be covering the methods to make it happen.
I hope it doesn't sound like I'm getting "too big for my britches" as my mother used to tell me, but, I have been on the trail of a simple, repeatable process for fine tuning these chairs, and I can't wait to share it.
For those of you who can't make it to WIA, rest assured, when I get this book/monkey off my back, I will surely be posting my results on Chairnotes.

Beside my talks, I hope you'll be able to come down and meet Claire, Tim, Charlie, Seth and all the other great folks in the Marketplace. Even my mother and brother will be there!
I can honestly say that last years event was one of highlights of my experience in the woodworking community.
Plus, if you ask, I can also share the results of my quest to make the perfect poached egg (yes, it involves making a proper spoon). I hope to see you there .


Wednesday, April 23, 2014

A little sample


The Lost Art Press blog featured a sample of the book yesterday. If you didn't see it already, check it out!

We are almost ready for filming Rough Cut tomorrow. Perhaps the best thing to come of it is that we had a great excuse to clean out the shop! I haven't seen it this clear in years.


I am finishing the prototype for the set of chairs that I'm reproducing. It came out darn close to what I wanted, but I've made changes for the final design after seeing it in person. It's usually the case that a drawing of a chair looks different than the actual results, so the prototype is usually a necessary step before making the chairs for the client.

The Original


If you ever visit, you'll see that I always end up with the prototypes. This chair is a simple form, but as I've made my way through all the aesthetic choices, I've found it to be a finely tuned design. I'll show more about this soon. I'll have plenty of chances while finishing 6 more of them.

Thursday, April 17, 2014

Starting from Photos


I've often been asked about starting a project from a photograph. I made my first chair that way, as a copy of one of Curtis Buchanans chair in a magazine. When I saw it in person, I was surprised by how far off the mark I was. Not only did I get just about every shape and proportion wrong, but the magazine had made his yellow chair look quite green. That was a lucky break for me as the green that I painted the chair became a favorite color!
Since then, I've learned a lot about the process.

A client recently asked me to reproduce a chair for a set, and the Museum where the original is housed refused to let us take measurements. Don't get me started...
Anyway, here is the scan that he sent me.


He is dropping the book by with the image soon so I can get better details, but this is my starting point.

My first step is to create a rough scaled drawing while getting to know the details and relationships in the chair. I'm trying to figure out the role that the different elements play so that I can get the overall impression to match, even before fleshing out the details.
I try to pin the scale of the chair by some educated guesses. Usually, older chairs like this are rather small, but a 17" to 18" height at the front is probably reasonable, and besides, it will ensure that the chairs can be used at a normal table. The chair is not shot straight on, which is almost always the case, but it is straight on enough that I can use the height to guess the distance between centerpoints of the bow where it enters the seat are about 13" apart. I confirmed this dimension on my own hoop backs as well as the measured drawings in John Kassays book.


Once I had those dimensions, I was able to start a scaled drawing at 3/16" scale. After I had found the width of the bow where it enters the seat on the 3/16" scale ruler, I printed a copy of the photo so that the dimension of the bow in the photo matched the drawing. From there I could scale all the parts directly from the photo.

Next, I'll refine all the proportions, measurements and angles in an accurate drawing that I can scale up for the patterns and forms.
Next week Tommy MacDonald is stopping by to film an episode of Rough Cut on building Windsors and we will be showing the construction of this chair.


Tuesday, April 1, 2014

Working Backwards

First, a quick announcement. Openings in my classes for this year are almost gone but there are a few spots left to anyone who doesn't want to wait until next year.
I will be at the Connecticut Valley School of Woodworking teaching the Continuous Armchair
Friday – Sunday April 11 – 13 & May 9 - 11  There are only a couple of spots open here.

And I have three classes this summer here in Sterling MA
June 23-28 Fan Back Side Chair

July 21-26 Balloon back Side Chair

August 11-16  Continuous Armchair (chairmaking experience required)
Each of these classes has a couple of openings, please contact me for more information


Hopefully you have seen the posts and videos that I did regarding my sightline rule. The sightline rule is basically a chairmakers framing square that eliminates the need to use trig tables or elaborate graphics to transform rake and splay into sightlines and resultant angles. If you didn't see them, check out this post ,or this one, or visit my youtube channel to see videos on the sightline rule.

Anyway, I've found one more handy way to use the sightline rule, which is to take an already existing pattern and derive the rake and splay from it. This is very handy if you want to use the same angles or change angles on an existing pattern and don't know the rake and splay. Here is an example


So there it is, rake of 17 degrees and splay of 16.5. Of course, if you knew this info first, you could simply follow the drawings in reverse to get the sightline and resultant.
It was a slap on the forehead when this one dawned on me. I still have the pdf's available if anyone wants the printout, email me at peter@petergalbertchairmaker.com

Wednesday, October 23, 2013

Magic?


I've been recovering from my trip to WIA this week.  I felt incredibly proud to be there with Claire Minihan, Tim Manney and Caleb James. The next time you hear someone grumbling about todays youth...just send them my way and I will blow them out of the water with the talent and incredible work ethic of these three. I could go on and on about the show, it was a highlight of my year.


Here is a stool that I brought along. I really shouldn't have heaped building this onto my plate while preparing to leave, but I had this itch to build something new and fun and it certainly fit the bill.


The "magic" part of this is twofold. First of all, in the first photo, it looks like a 3 legged stool in the photo even though it has 4. With curved legs like this, that can only mean one thing. The sightlines run directly from the front leg to the rear on the opposite side of the seat. I've never done this before and am very pleased with the results.


The rear legs are closer together in the seat and are reamed at a slightly greater angle.

The other "magic" is the finish, which only took a few hours start to finish and came out great. I was hoping for a worn black lacquer look to go with the Asian style and am very pleased. I'll share the process in another post soon.

Saturday, October 5, 2013

Autumn Rocker

A few years ago, I was inspired by the colors and new growth of Spring when building a curved settee and I named it the "Spring Settee". It's still the front page of my website.


Now it's a different season and I suppose that it's no surprise that  I've been  drawn toward the earthy browns and oranges. Here is my latest rocking chair.

 I've been playing with the milk paint and shellac combinations to build a burnt orange with some depth.


 The process used the Real Milk paint company colors Goldenrod and Butternut and the shellac was tinted with stains Early American Maple and Engish Oak from Lockwood Stains. I built the color by layering the paint and shellac and then topping it off with Waterlox and finally raw tung oil.
 
 I tried to keep the warmth and grain of the wood showing through while using the paint to tame the differences in the species. I am pleased with the results and hope to refine them more. I will happily share my recipes and process once I've got a better handle on it. There are just too many variables that I am still grappling with.

It's been a learning experience that began with a chair that I built this spring. I was commissioned to build a replica of a chair owned by Ezra Stiles, an early President of Yale University. It was a gift to the retiring President who loved the chair that sat in his office.
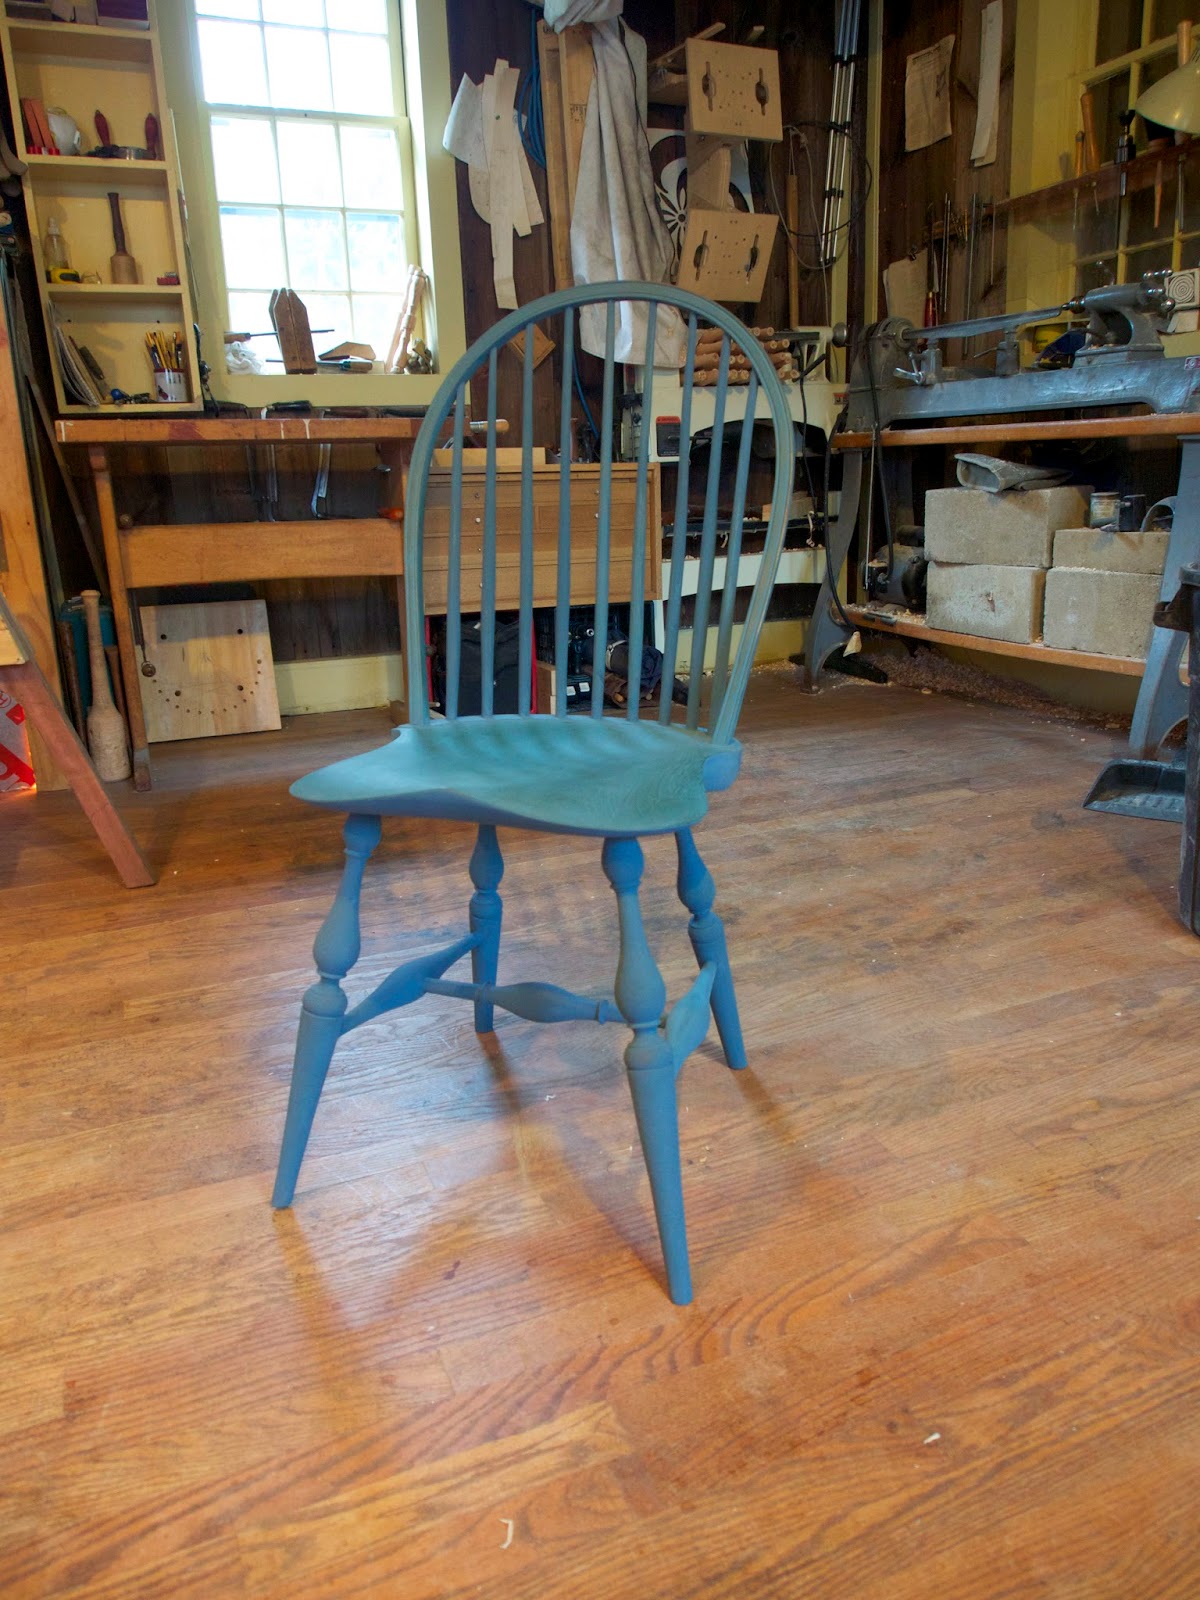
 They asked me to make the chair look as much like the original as I could and I was concerned that using stains alone wouldn't do it. I have lots of old wood in the house and one thing that I noticed was the way that the patina masks the grain. I thought a translucent layering of milkpaint could create this effect. Here is the chair "in the white".
 Here is the finished chair. I had the seat done in natural rush by an expert weaver.
Finishing is always an opportunity to make or break a piece of furniture. I have painted lots of chairs and while the standard results that I've gotten are pleasing, I think there are too many options and possibilities that might add to the chairs to stop trying new things.


Tuesday, September 17, 2013

Nice to Meet You

Since I moved to Sterling, Massachusetts, I've been swamped with projects and traveling and had little time to get to know my community or let them know me. That changed when I talked to Dave Gibbs at the Sterling Historical Society about combining our efforts and interests. The Society has a lovely collection of Windsors that were made here in town as well as a barn full of the old tools from its workshops. The first floor of the barn is relatively empty, and I thought it would be a great location to host some 6 person classes. So, next summer, I hope to schedule three classes there, but I'll post more on that once we work out the details.
To help introduce me to the community, the Sterling Historical Society hosted a demonstration at the local American Legion post and Ross Jones of Harvard Video Productions filmed it for us. Here is the video of the demonstration.
If it doesn't appear on your screen, click here to go to the original site.


As you can see, I am elated to be starting this project. I think 6 is a great number of students for a class. Plenty enough for a group energy and atmosphere but few enough for lots of personal attention.

And if I got you interested in my talk with Dudley Hershbach, here is a great interview with him that I found every bit as engaging as sitting next to him on the plane.


and once again, the link if you don't see the video here.

Tuesday, July 16, 2013

One Last Shot

There is one opening left for the class that I am teaching at the Connecticut Valley School of Woodworking beginning this Friday. I am excited because we are trying a new format. The class is being broken into two sessions of three days a piece. This will allow the students to finish some of the parts at home which will take some pressure off of the class and give us a chance to rest. If most of my teaching didn't involve long distance travel, I would probably do all of my classes this way. As I said, there is still one opening, I hope to see you there.

Here is a prototype for a Birdcage rocker that I am developing. I has always loved this style and am having a ball making it with all of the techniques and design ideas that I've been playing with for the past few years.

I went to the Museum of Fine Arts in Boston a week or so ago and saw an amazing Samuria exhibit. Anyone who knows me well knows that I have a couple of distinct quirks. I wake up every night for a couple of hours in the middle of the night and I generally use the time to memorize every moment of Akira Kurasawa films, especially the Samurai genre.
I have always admired the Black lacquer of the Japanese, but felt the application would be a pain on my chairs. I decided to paint this chair a solid black, which strangely enough, I don't think that I've ever done before. Coupled with the shellac that I have been using these days, the black milk paint finish gives a nice nod to the Japanese lacquer finish and goes well with the Asian influence of the style.
I used a goldenrod undercoat and cream in the v notches.


I've got another decorative addition, but I'm not quite ready to share!

Wednesday, May 8, 2013

Box Shaped People


I bought a new push lawn mower the other day, and like a two year old at Christmas, I had much more fun playing with the box than with the mower.
I've spent lots of time thinking about the shaped of the spindles in the backs of chairs and because I use spindles, it's easy to get stuck thinking vertically. But the shape of the human body doesn't follow a singe vertical curve at every spot. So I started thinking about the relationships as they proceed horizontally. With the hardy cardboard, I mocked up this chair back by aligning four curves. It is surprisingly comfortable and sturdy.


 Each curve is actually slightly cones shaped. It was easy and took only a half hour or so, but it confirmed a lot of what I have been doing with my spindles and encouraged me to go even further.

Here is the view of the back. I started by pinning the piece together with drywall screws and adjusting them as I saw fit.

Then I took the small blocks of plywood and spun the screws until the plywood was sucked tight to the cardboard. The single board clamped to the workbench puts the support in just the right spot so I can rest my weight on it. From there, I mapped out the spindle shapes and will be making some patterns and dummies to further test it out. We will be working with this more to design some chairs at the class that Greg Pennington and I will be teaching at Kelly Mehlers in a couple of weeks.

As you can see in the chair below, I have been highlighting similar shapes in the flat spindles of my chairs for some time now.

This is my first walnut rocker with hickory spindles. Over time, the hickory will mellow to a lovely amber and the walnut will lighten. I didn't know exactly how I would feel about the contrast, but it is striking in person and quite pleasing.

I've accentuated the chamfers on the spindles which adds a lot of interest to their blonde color.
And spring is here, so we've got some new chicks in the house!!
Ten ladies should keep the whole neighborhood in eggs. The are growing like weeds, it's almost disconcerting.
And I opened up the goat paddock into the woods so my kids could climb rocks and eat shrubs.
In case you don't see them, here they are, livin large, just like the rest of us.

Friday, April 26, 2013

Dialing it In


I successfully used the new rocker routing fixture to cut the slots in the walnut chair that I am finishing up.

I suppose that a quick word is in order about my reasons for going to the trouble of building this tool. While I enjoy doing many things with hands tools, because they give me lots of control, freedom and results that machines can't match, when it comes to rockers, I have a different priority.
Designing and building rockers is a process full of variables. To rock successfully, rockers must be oriented to each other and the chair correctly. Any variation in the process of cutting the slots and fitting the rockers can make it difficult to refine the design. Also, the references used to locate the slots can greatly affect the consistency from chair to chair.
What this fixture does, is create repeatable and consistent rocker slots based on references that allow me to focus on the other variables that go into making a rocker.  For me, nailing down the relationship between the seat and the rockers is the next step towards a deeper understanding and freedom in rocking chair design.

I am going to show some photos here, and hopefully you can see that while it has some adjustable parts, the fixture is simple and does a simple job. The photo below shows one the primary advantages of the fixture, which is that the two platforms are automatically parallel to each other which insures that the slots are as well.
Here are the slots already routed. The straight edge lies dead flat against the inside of the slot on both legs.

 Another variable that the fixture addresses is the different splay of the legs. You can see this in the photo below if you look closely.
The slot on the leg in the foreground is slightly tilted off the axis of the leg. You can especially notice this if you compare the half circle shaped material remaining at the bottom of the leg. The slot in the leg in the background does the same thing, but in the opposite direction. The reason for this is that the slots must be oriented to split the difference between the splay of the front and rear legs.
Most importantly, the slot is in the center of each leg at the deepest point, for strength. The jig does this automatically. I'll explain how it does this later, but for now, I just want to point out the variables.
The process follows these steps.
First, I measure the splay of the front and rear legs, in this case 13 degrees for the front and 19 for the rear, which gives me an average of 16 degrees. I pivot the central panel to 16 degrees, push the chair up against the jig and position the two platforms. Then I route the slots.
Next, I swing the pivoting panel the opposite direction (16 degrees again), with the platforms still fixed, reposition the chair, and route the other legs.
Using the fixture was a breeze and so many of the troublesome layout and fitting issues that I've always encountered were either eliminated or greatly simplified.

Above, you can see how I measure the slot angles to transfer to my rocker pattern. If all is right, there is no fiddling around or fitting and I can repeat the results on the next chair. I will be shooting video of the process, but I think that introducing the variable over a few posts might make it all more understandable.

Thursday, April 18, 2013

Unambiguous

Making shapes in wood is what got me into furniture making. I recall seeing the sculptural curves in Sam Maloofs work and coveting his job. Don't worry, I won't be drawing any comparisons between what we do except to say that there is a lesson that I drew from looking at his results, and the results present in so many Windsors.
The basic idea is simple, each shape should have a geometric logic within itself and a sense of tension with the other pieces that it joins to. Without this, parts and entire pieces of furniture look "ooey gooey", like they are melting or have worn slack.
I have a few techniques that I use to help create the logic within a piece. Mostly, they involve following a series of geometric shapes as inbetween steps so that the final shape has a hidden framework that helps define it.

I was thinking about this today while shaping the curved stretchers for a rocker that I am finishing. I had some issues when bending the stretchers turned to their final shape, the tapers had too much runout and cracked. So I turned the piece at a cylinder and bent it. The bend went fine, but then it was up to me to carve the tapers.
As you can see, I shaved the round part into an octagon. Round is a time consuming and difficult shape to adjust and fair. When I have to remove a bunch of wood, I usually revert to the octagon, which makes it very simple. I just keep working on each facet until the taper of the facet is pleasing and matches the other 7. Then round is an easy step away. Note the felt on the bending form. It took a negative impression of the stretcher and left the surface of the walnut round and uncompressed.
Here is another shot of the stretcher, and yes, I can finally work outside.
Here is is inside the chair. I like the way that the stretcher "pushes" against the legs and echoes the curves of the rockers. The only issue is my every worsening reaction to the walnut, which might make this my last project with this great wood. But of course, never say never.